Year-round gardening offers a multitude of benefits: extended harvest seasons, fresher produce, and more opportunities for self-sufficiency. However, growing plants beyond the typical growing season requires a strategic approach to temperature control, protection from the elements, and efficient use of space. For advanced gardeners, building hoop houses and low tunnels can be a game-changer in ensuring crops thrive through winter’s chill and the shoulder seasons.
In this blog post, we’ll explore how to design and build advanced hoop houses and low tunnels that maximize plant health, ensure longevity, and make your garden productive all year long. Whether you’re looking to grow early spring greens or extend your harvests deep into the winter, these structures can be customized to fit your needs and the unique climate of your region.
Understanding Hoop Houses and Low Tunnels
Both hoop houses and low tunnels are structures designed to protect plants from extreme weather conditions while maintaining a suitable growing environment. The key difference lies in the scale and complexity of the design.
-
Low Tunnels: These are smaller, simpler structures made by arching flexible materials (often hoops made from PVC or metal) over rows of plants. Typically, they cover plants only a few feet high and are often used to protect crops from frost, wind, and light snow. Low tunnels are commonly covered with plastic or row covers.
-
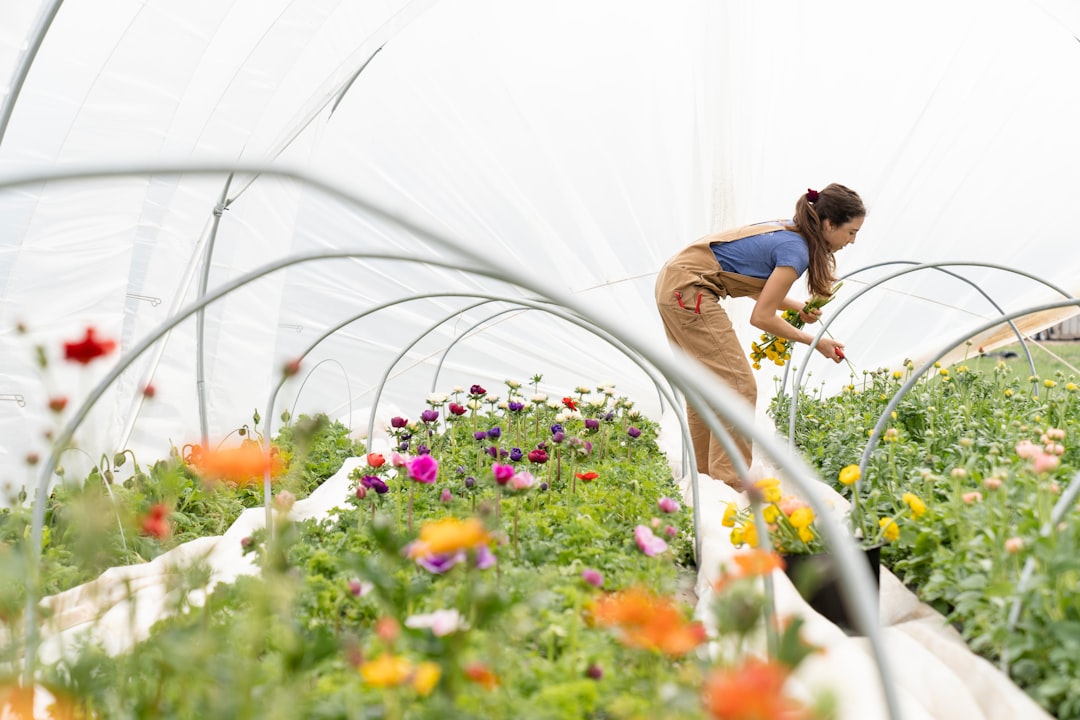
Hoop Houses: A hoop house is a larger, more permanent structure, typically high enough to walk inside, and can be used year-round with proper insulation. Hoop houses have greater potential for temperature regulation and are generally more robust than low tunnels, offering better protection against extreme weather.
Both types of structures are highly versatile and cost-effective solutions for extending the growing season.
Key Considerations for Designing Advanced Hoop Houses and Low Tunnels
Before embarking on building a hoop house or low tunnel, it’s important to consider several key factors that will impact the design, functionality, and longevity of the structure. These include the local climate, the types of crops you intend to grow, and the long-term maintenance of the structure.
1. Climate and Environmental Conditions
The climate where you live will determine many of the features you need to incorporate into your hoop house or low tunnel design:
-
Winter Conditions: If you’re planning to grow year-round in a cold region, consider incorporating thicker plastic, double-layered covers, or additional insulation to prevent freezing temperatures from damaging your plants. In particularly cold areas, hoop houses may need heating elements (like soil heating cables or passive solar designs) to ensure adequate warmth.
-
Wind Exposure: In areas with high winds, make sure your structure is anchored securely to prevent it from being blown away. Consider stronger frames made from galvanized steel or treated wood and ensure that the plastic covering is tightly secured to avoid wind damage.
-
Sunlight: Make sure your hoop house is positioned to take full advantage of sunlight during the winter months when daylight hours are shorter. In the summer, consider shading solutions to prevent overheating inside the structure.
2. Size and Shape of the Structure
The size of your hoop house or low tunnel should be tailored to the available space and the amount of produce you want to grow. Here are some considerations:
-
Height: The height of the hoop house depends on your crops and how much space they require to grow. For instance, growing taller plants such as tomatoes or peppers will require a higher hoop house (at least 7-10 feet), while shorter crops like lettuce or radishes can thrive in smaller, low-tunnel setups.
-
Width: Typically, hoop houses are between 10-30 feet wide, allowing enough space for rows of crops, aisles for walking, and ventilation. Narrower designs (5-10 feet wide) work well for low tunnels, especially in raised beds or intensive planting systems.
-
Length: Length will depend on available space and the quantity of plants you wish to grow. Hoop houses can range from a few feet long to over 100 feet, with larger ones requiring additional structural reinforcement.
3. Materials for Construction
Choosing the right materials is critical for ensuring the longevity, strength, and effectiveness of your hoop house or low tunnel.
-
Frame: The frame is the backbone of the structure, and it’s important to use durable materials. PVC pipes are lightweight, easy to work with, and inexpensive, making them suitable for small hoop houses or low tunnels. For more robust, long-lasting structures, galvanized steel tubing or rebar can provide superior strength and stability, especially for larger hoop houses.
-
Covering: The covering material should be UV-resistant, flexible, and breathable. Common options include:
- Single-Layer Plastic: Polyethylene is a widely used material that can be fitted over hoops to form a protective barrier. It’s effective for moderate climates, but it may not offer enough insulation for harsh winters.
- Double-Layer Plastic: Using two layers of plastic with an air gap between them increases insulation and helps trap heat inside the structure. This design is especially useful for winter gardening.
- Shade Cloth: In areas with extreme summer heat, consider adding a shade cloth to regulate temperature and prevent overheating.
- Row Covers: Lightweight floating row covers can be used over crops in low tunnels to protect against light frost and insects.
-
Ventilation: Proper ventilation is crucial to avoid overheating and excessive humidity, especially in hoop houses. Incorporating side walls that can be rolled up or adjustable vents on the roof can help maintain airflow.
4. Temperature Regulation and Insulation
Managing temperature fluctuations is one of the most important aspects of year-round gardening in hoop houses and low tunnels.
-
Passive Solar Heating: A passive solar design makes the most of natural sunlight to maintain internal temperatures. Positioning the structure with a southern exposure maximizes sunlight during the winter months. Using dark-colored soil or thermal mass materials, such as concrete or water barrels, can help absorb and release heat to regulate temperature.
-
Soil Heating: For additional warmth, consider installing soil heating cables beneath the planting beds. This method is especially useful for early spring planting or winter crops that need consistent warmth at the root level.
-
Insulation for Winter: If you live in a particularly cold region, double-layered plastic or additional insulation such as bubble wrap, foam board, or thermal blankets can help protect plants from freezing temperatures. You can also add frost protection blankets over plants during extreme cold spells.
Steps to Build Your Hoop House or Low Tunnel
Now that you understand the design considerations, here’s a step-by-step guide to building your own hoop house or low tunnel:
1. Build the Frame
- For a low tunnel, create arches using PVC pipes or rebar. Bend the pipes into arcs and secure them into the ground. The spacing of the hoops should be around 3-4 feet apart for adequate coverage.
- For a hoop house, construct the frame using either PVC pipes or galvanized steel tubing. If using steel tubing, you may need to use a conduit bender to create the arches.
2. Secure the Covering
- Once the frame is complete, drape your plastic or row cover material over the hoops. Ensure the material is tightly secured to prevent wind damage. Use clips or twine to attach the covering to the frame.
- For a double-layered hoop house, install the second layer of plastic, leaving an air gap between the two layers to improve insulation.
3. Install Ventilation and Doors
- To allow airflow, install roll-up sides or vents at the top or side of the structure. This will ensure that your plants receive fresh air and prevent excessive humidity.
- Add a door or flap at one end for easy access and to control ventilation.
4. Final Touches
- Add pathways for easy access to your plants, and use gravel or mulch to maintain clean, dry surfaces.
- If desired, incorporate raised beds or irrigation systems to make the most of the available space.
Conclusion
Building a hoop house or low tunnel is a rewarding and practical investment for gardeners who want to extend their growing season and produce fresh, healthy crops year-round. By selecting the right materials, designing for temperature control, and considering local climate conditions, you can create a structure that not only protects your plants but also enhances their growth potential.
Whether you're growing vegetables, fruits, or flowers, an advanced hoop house or low tunnel can give you the freedom to garden through the cold months, increase crop yields, and enjoy the fruits of your labor long after the traditional growing season has ended.
Comments
No comments yet. Be the first to comment!
You must be logged in to comment. Login