For gardeners looking to extend their growing season and gain a jump-start on the next planting cycle, cold frames and hotbeds are invaluable tools. These structures are perfect for fostering plants in the early spring and late fall, enabling gardeners to grow tender crops outside of their usual growing season. Whether you’re looking to get an early harvest of greens or extend the life of your crops as temperatures dip, mastering cold frames and hotbeds can make all the difference.
In this blog post, we’ll explore the differences between cold frames and hotbeds, how to build them, and the best strategies for using them effectively to maximize your gardening success.
What Are Cold Frames and Hotbeds?
Cold Frames and Hotbeds are both types of mini-greenhouses designed to protect plants from frost and temperature fluctuations. They provide a more controlled environment, giving your plants the warmth they need while protecting them from extreme weather.
-
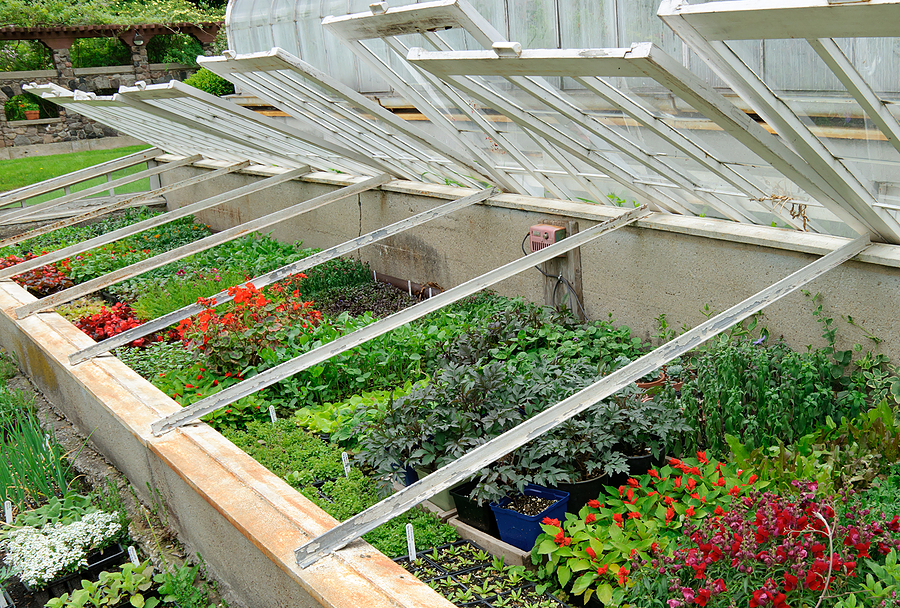
Cold Frames: A cold frame is a simple, unheated structure that uses solar energy to create a warmer environment for plants. The structure typically consists of a transparent lid (usually glass or clear plastic) that allows sunlight to enter and warm the air inside, while the soil retains heat from the sun. Cold frames provide passive warmth by trapping sunlight and using the insulating properties of the soil. However, they don't rely on additional heating, making them less effective in extreme cold.
-
Hotbeds: A hotbed is essentially a cold frame with added heat. This heat is typically generated by decomposing organic matter, such as manure or compost, placed beneath the soil inside the frame. The heat from this organic material helps maintain a warm growing environment for plants even in cooler temperatures. Hotbeds are especially useful for starting seedlings in early spring or providing a warm space for sensitive plants that need extra heat during cold months.
Why Use Cold Frames and Hotbeds?
Both cold frames and hotbeds offer several key benefits for gardeners looking to extend their growing seasons and improve their crop yields.
-
Early Planting and Seed Starting: Cold frames allow you to start seeds early in the spring by protecting them from frosty nights. Hotbeds take this a step further, providing consistent warmth for seed germination and growth.
-
Late Harvests: As the growing season winds down, cold frames and hotbeds offer a way to harvest crops later into the fall and even into the winter in some climates. They can help protect late-season crops like lettuce, spinach, or even root vegetables from the first frost.
-
Increased Crop Variety: With cold frames and hotbeds, you can grow crops that would normally be too tender or cold-sensitive for your region. For example, tomatoes, peppers, and melons can be started earlier and harvested later than usual.
-
Space Efficiency: Cold frames and hotbeds are especially useful for gardeners with limited space. They allow you to grow in small, confined areas, making them perfect for urban gardening or small plots.
Building Your Cold Frame
Cold frames are relatively easy to build and require only a few basic materials. Here's a step-by-step guide to constructing a simple cold frame:
Materials Needed:
- Frame: Use wood, cinder blocks, or bricks for the base. Pressure-treated lumber or recycled materials work well for the frame.
- Lid: Glass or clear polycarbonate are the best materials for the lid because they let light through and provide insulation. Old windows can often be repurposed as lids.
- Hinges: If you want the lid to be adjustable, use sturdy hinges for easy opening and closing.
- Soil: Make sure the soil inside is well-draining and rich in organic matter to promote healthy root growth.
Instructions:
-
Build the Base: Construct a simple rectangular frame that is around 2 to 3 feet high at the back (the side facing the sun) and slopes down toward the front. This slope allows sunlight to hit the plants more directly.
-
Install the Lid: Attach your transparent lid using the hinges. It should be slanted to maximize sunlight exposure and allow for easy ventilation. Consider leaving a small gap at the top of the cold frame for airflow.
-
Position the Cold Frame: Place the cold frame in a sunny location where it will receive full sunlight during the day. Ideally, the long side of the cold frame should face south (in the Northern Hemisphere) to maximize sunlight exposure.
-
Plant and Monitor: Fill the cold frame with soil, plant your seeds or young plants, and monitor the temperature inside. The lid should be opened during the day to prevent overheating and closed at night to keep warmth in.
Building Your Hotbed
Hotbeds are a bit more complex than cold frames, but they provide additional heat, making them a great option for early spring planting or growing heat-loving crops in colder climates.
Materials Needed:
- Frame: Similar to the cold frame, but the structure needs to be deep enough to accommodate the organic material (compost or manure) underneath the soil.
- Compost or Manure: Horse manure or chicken manure is commonly used for generating heat in hotbeds, as it decomposes and releases warmth.
- Soil: Add a few inches of good-quality, well-draining soil on top of the manure or compost to create a growing medium for your plants.
- Lid: Use glass, clear plastic, or even old windows as the lid for the hotbed.
Instructions:
-
Prepare the Base: Build a frame similar to a cold frame, but make it deeper—around 18 inches deep—to hold the decomposing material. Lay the frame directly on the ground or raise it slightly on bricks for better drainage.
-
Add Organic Material: Place a thick layer of well-aged manure or compost in the bottom of the frame. This material should be dampened before use, and the temperature of the decomposing organic matter will start to rise within a few days to weeks. The heat generated will warm the soil above it.
-
Add Soil: Place 3 to 6 inches of loose, fertile soil on top of the compost or manure layer, which will be the medium where your plants grow. Make sure the soil is nutrient-rich and has good drainage.
-
Install the Lid: Just like with a cold frame, place your transparent lid over the frame to trap heat and allow sunlight to enter. Ensure that the lid is properly ventilated so the plants don’t overheat.
-
Monitor Temperature: Hotbeds require a little more attention than cold frames. The heat from the decomposing organic material can fluctuate, so keep an eye on the temperature inside. When the heat starts to subside, you can add more fresh compost or manure to generate additional warmth.
-
Plant and Maintain: Once your hotbed is at the right temperature, you can plant your seedlings. Monitor them closely and provide ventilation as necessary to prevent overheating. The heat will encourage faster germination and growth.
Best Practices for Using Cold Frames and Hotbeds
-
Timing: Start planting your cold frame or hotbed crops as soon as the soil can be worked in the spring, or use them for late fall harvests when frost is near. The key is to provide protection against unpredictable weather and frost.
-
Crop Selection: Cold frames are perfect for cold-hardy crops like lettuce, spinach, radishes, and herbs. Hotbeds are ideal for heat-loving plants like tomatoes, peppers, and melons. Both structures can be used to grow early spring greens or to extend the growing season for fall vegetables like carrots, kale, and cabbage.
-
Ventilation: It’s essential to ensure adequate airflow inside your cold frame or hotbed. During the warmer months, particularly in spring and summer, temperatures can rise rapidly. Open the lids during the day to prevent overheating, and close them at night to retain heat.
-
Frost Protection: In the fall or spring, when frost is a concern, ensure your cold frame or hotbed has proper insulation and consider using frost blankets over sensitive plants during particularly cold nights.
Conclusion
Cold frames and hotbeds are fantastic, low-tech solutions for extending your growing season, offering an early start in the spring and allowing for later harvests in the fall. With a bit of planning, the right materials, and some attention to detail, you can create a thriving garden in almost any climate. By mastering these two structures, you’ll be able to enjoy fresh, homegrown produce year-round and get the most out of your garden, no matter the season.
Comments
No comments yet. Be the first to comment!
You must be logged in to comment. Login