As the harvest season comes to a close and fresh, local produce starts to dwindle, many of us turn to preserving food for later enjoyment. Canning, pickling, and fermenting are traditional methods that allow you to extend the life of seasonal ingredients while maintaining their flavor, texture, and nutritional value. In this blog post, we’ll dive into the art of preserving local food and explore how these methods can help you enjoy the fruits of the season all year long.
🌿 Why Preserve Local Food?
Preserving local food is a great way to enjoy the abundance of your garden, local farmers' markets, or your CSA (Community Supported Agriculture) share long after the growing season ends. It’s also an effective way to reduce food waste by preserving excess produce that might otherwise go bad. Beyond practicality, these preservation techniques also give you control over the ingredients you use, reducing your reliance on store-bought, heavily processed foods.
Here are some reasons why preserving local food is a worthwhile endeavor:
-
Seasonal Enjoyment Year-Round: Enjoy the taste of your favorite fruits, vegetables, and herbs no matter the season.
-
Nutrient Retention: Many preservation methods, such as canning and fermenting, help retain the nutrients of the food while extending its shelf life.
-
Cost-Effective: Preserve food when it’s abundant and cheaper, so you can stock up for the months when fresh produce is less affordable.
-
Culinary Creativity: Preserved food can inspire new flavors and cooking techniques, allowing you to experiment with your meals in unique ways.
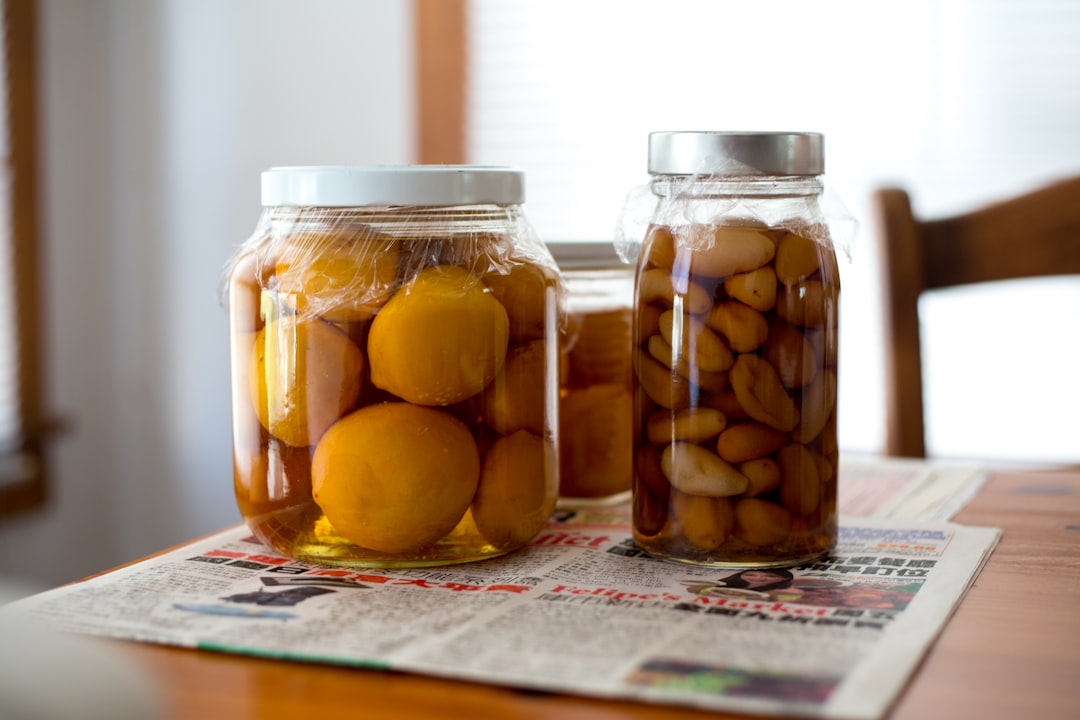
🍅 Canning: Sealing Freshness in Jars
Canning is one of the most popular preservation methods, allowing you to store food for months or even years. The process involves placing food into jars, sealing them, and then processing the jars in boiling water or under pressure to kill bacteria and create a vacuum seal that keeps air out.
What Can Be Canned?
-
Fruits: Apples, berries, peaches, tomatoes, and pears are commonly canned.
-
Vegetables: Green beans, corn, carrots, and beets are excellent choices.
-
Jams and Jellies: Preserves made from fruit are a fun way to enjoy sweet seasonal flavors.
Basic Canning Process:
-
Prepare Your Food: Wash and chop your fruits or vegetables.
-
Sterilize Jars: Clean your jars and lids with hot, soapy water, then sterilize them by placing them in boiling water or using a dishwasher.
-
Cook the Food: Some foods, like fruits for jams or tomatoes for sauce, need to be cooked before canning. Follow specific recipes for your ingredients.
-
Fill the Jars: Carefully pack your cooked food into the jars, leaving enough space at the top for expansion during processing.
-
Seal the Jars: Wipe the rims of the jars clean before placing the lids on. Screw on the metal bands (not too tightly).
-
Process the Jars: Depending on what you're canning, place the jars in a canner and process them for the appropriate amount of time.
-
Cool and Store: Once processed, remove the jars from the canner, let them cool, and check that the lids have sealed. Store them in a cool, dark place.
Pro Tips:
-
Use fresh, high-quality ingredients for the best results.
-
Always follow tested recipes to ensure safety, especially when canning low-acid foods (like vegetables or meats) that require pressure canning.
🥒 Pickling: A Tangy Twist on Preservation
Pickling is a method that involves immersing food in an acidic solution (usually vinegar or brine) to preserve it. The acidity helps prevent the growth of harmful bacteria while giving the food a delightful tang.
What Can Be Pickled?
-
Vegetables: Cucumbers, carrots, onions, cauliflower, and beets are commonly pickled.
-
Fruits: Apples, peaches, and even berries can be pickled for a sweet-and-sour flavor.
-
Herbs and Spices: Dill, garlic, and chili peppers make excellent additions to your pickling mix.
Basic Pickling Process:
-
Prepare the Vegetables or Fruits: Wash and cut them into the desired shapes (slices, spears, etc.).
-
Make the Brine: Combine vinegar, water, salt, and sugar in a saucepan and bring to a boil. You can also add spices like garlic, dill, mustard seeds, or peppercorns for extra flavor.
-
Pack the Jars: Place your prepared vegetables or fruits into sterilized jars. If you like, add herbs or spices at this stage.
-
Pour the Brine: Pour the hot brine over the food in the jars, ensuring the food is fully submerged. Leave some space at the top of the jar.
-
Seal and Cool: Seal the jars and let them cool to room temperature. If you’re making refrigerator pickles, store them in the fridge after they’ve cooled. If you want long-term storage, process the jars in a water bath canner.
Pro Tips:
-
Experiment with different vinegars (apple cider, white, or rice vinegar) to adjust the flavor.
-
Pickling usually takes a few days to a week for the flavors to fully develop, but refrigerator pickles can be eaten almost immediately.
🥕 Fermenting: A Natural Way to Preserve with Probiotics
Fermentation is an ancient method of preserving food that not only extends shelf life but also enhances the food’s nutritional profile. Fermented foods are rich in probiotics, which are beneficial bacteria that support gut health.
What Can Be Fermented?
-
Vegetables: Cabbage (for sauerkraut), carrots, cucumbers, and radishes are excellent choices for fermentation.
-
Fruits: Apples and grapes can be fermented into cider or wine.
-
Grains: You can ferment grains to make things like sourdough bread.
Basic Fermentation Process:
-
Prepare Your Food: Chop or shred vegetables, like cabbage for sauerkraut or cucumbers for pickles.
-
Salt the Vegetables: Mix the vegetables with salt (generally about 2 tablespoons of salt per 1 quart of vegetables). The salt helps to draw out water and create a brine.
-
Pack the Food into Jars: Pack the salted vegetables tightly into jars, pressing them down to remove air pockets. Cover them with the brine that has formed.
-
Ferment: Place the jars at room temperature, away from direct sunlight. Check the jars every day to make sure the food stays submerged in the brine. Fermentation usually takes 3-7 days, depending on the temperature and the food.
-
Taste and Store: Taste the fermented food to see if it’s reached your preferred level of sourness. Once it’s ready, store it in the fridge to slow down the fermentation process.
Pro Tips:
-
Keep the food submerged to avoid exposure to air, which can lead to mold growth.
-
Use a fermentation weight or a makeshift weight (like a clean rock or jar) to keep vegetables submerged in the brine.
🍇 Conclusion: Embrace the Art of Preservation
Canning, pickling, and fermenting are not only great ways to preserve local food, but they also give you an opportunity to reconnect with traditional food preservation practices. Whether you’re enjoying homemade pickles in the winter, savoring a jar of canned tomatoes in the spring, or snacking on probiotic-rich fermented vegetables, these methods allow you to enjoy the bounty of the harvest all year long.
As you dive into preserving your seasonal produce, remember that practice makes perfect, so don’t be discouraged if it takes a few tries to master your favorite methods. Have fun experimenting with new recipes and flavors while helping to reduce food waste and support local food systems.
Comments
No comments yet. Be the first to comment!
You must be logged in to comment. Login